If you have a box of old VHS or Hi-8 tapes sitting in a closet — birthdays, soccer games, camcorder footage from a trip you barely remember taking — this post walks through how to get all of that off the tapes and into cloud storage.
This is the cloud version of my converting tapes to DVD article that explains how to upload your files to a cloud service so they live somewhere other than your house.
What you need
You need 4 things: a VHS player, a USB video capture device, cables to connect them, and a cloud storage account.
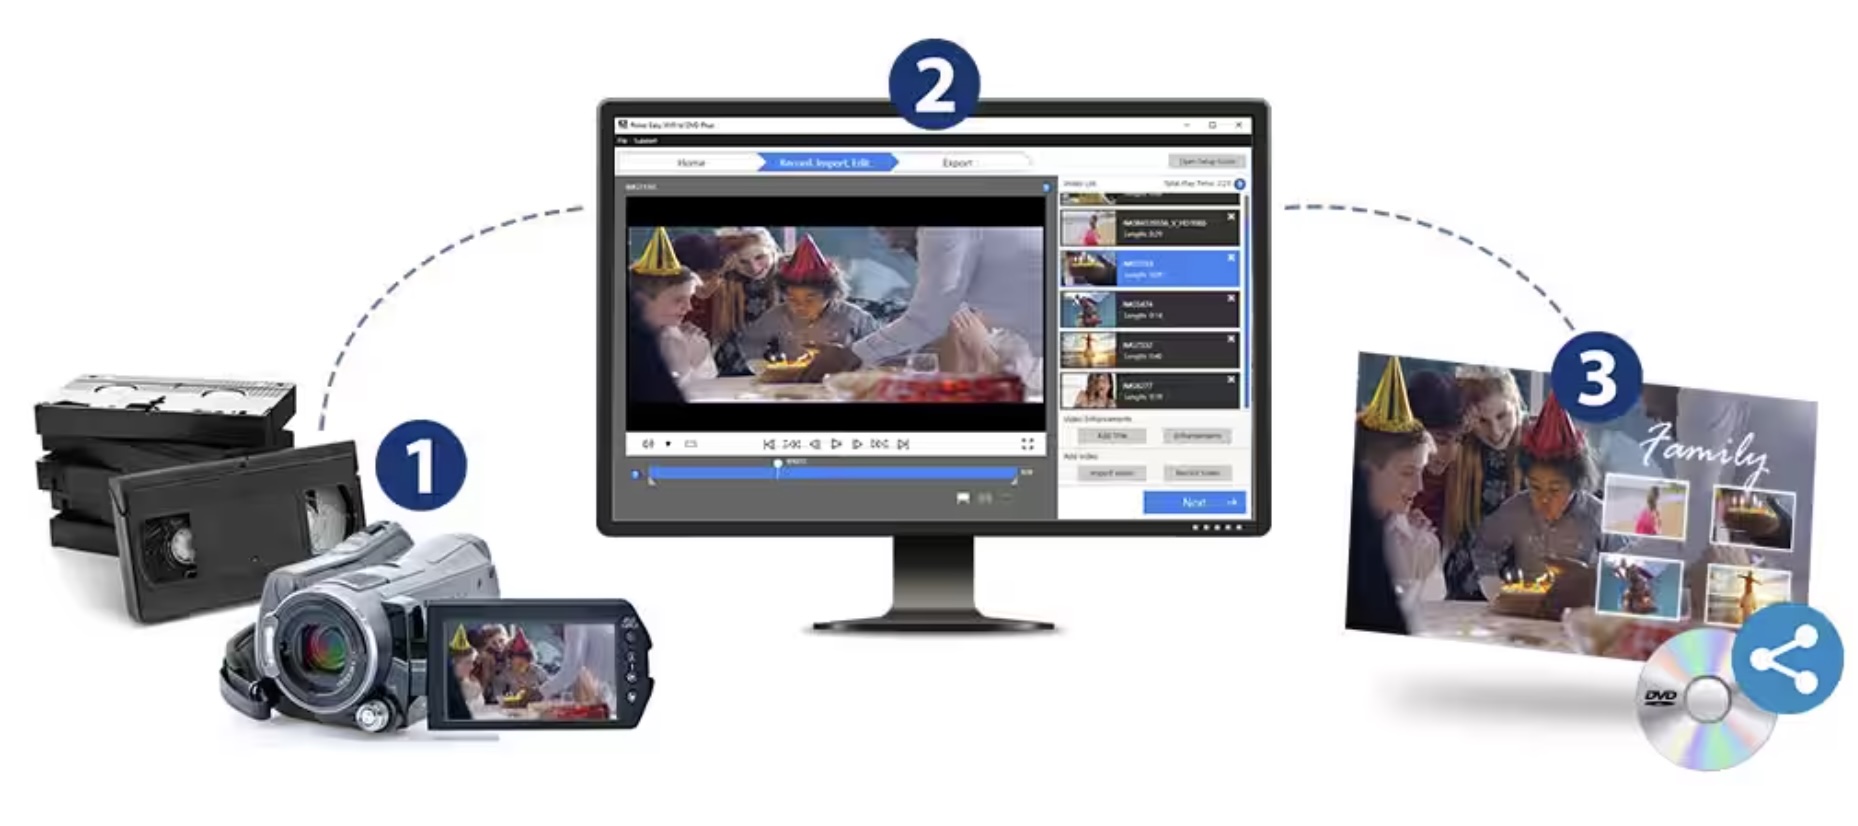
The player is a VCR for VHS tapes, or the original camcorder for Hi-8, MiniDV, or 8mm. Old camcorders and VCRs output analogue video through RCA jacks — the yellow plug is video, red and white are the two audio channels. Your computer can't do anything with that signal directly, so a video capture device sits in between: RCA cables go in one side, USB into the computer on the other, and it turns the analogue signal into something the computer can record.
Basic USB capture adapters run about $20 to $30 and work fine for home footage. If you'd rather buy one box with everything in it (adapter, cable and sofware), Roxio Easy VHS to DVD is sold as a kit with the capture hardware and software bundled together. Despite the name, it produces video files on your computer — burning a disc at the end is optional, and for this project you'll skip that step entirely.
Check the tapes first
Before you buy anything or set anything up, play each tape for a minute and make sure it still runs. Tapes that have sat in a garage or attic for twenty years can get sticky, shed oxide, or jam the player. A tape that squeals, jams, or shows heavy snow across the picture needs a different approach than what's covered here — usually a professional service that can bake the tape to restore it temporarily for a single play.
If the tape plays cleanly for a minute, it will almost certainly make it through a full capture.
Capturing
Connect the yellow, red, and white RCA cables from the player's output into the capture device, and plug the USB side into your computer. Install whatever software came with the capture device, or use the software in the Roxio kit (recommended) if that's what you bought.
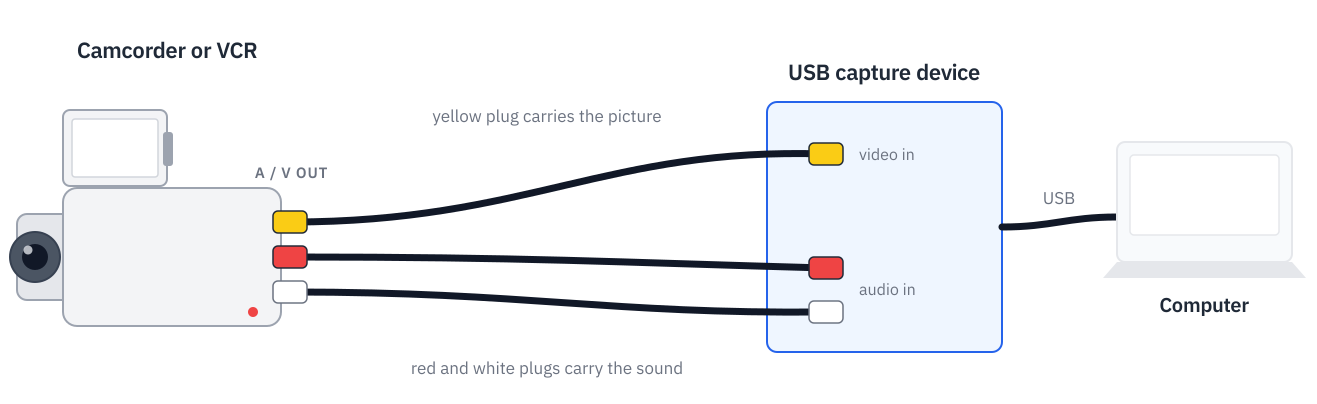
Open the software, find the input setting, and set it to composite rather than tuner. This is the most common reason people get through all the setup and then see no picture on the first attempt — the software defaults to looking for a TV signal instead of the RCA input you just plugged in.
Press play on the player and record on the computer. Capture happens in real time, so a three-hour tape takes... three hours. There is no way to speed that up — the computer is recording the tape as it plays, the same way a VCR used to record off the TV. Do it in batches: start a tape, go do something else, come back when it's done.
Converting to MP4
Capture software writes very large files, usually AVI or raw MPEG. An hour of captured video can run anywhere from two to twelve gigabytes depending on the settings. A full shelf of tapes in that format adds up to hundreds of gigabytes, and the cloud plan you end up needing depends on whether you upload them that way or convert them first.
Convert to MP4 using H.264 before you upload anything. This typically cuts the file size to a quarter or less of the original, with no visible difference when you play it back on a TV or phone. HandBrake is free and handles this: point it at the captured file, pick an MP4 preset, and let it run. But Handbrake is clunky to work with and you have to be a little technical to figure out all the options.
Roxio does the same job with a much easier setup if you'd rather not deal with HandBrake's interface.
Convert in batches too. Most of these tools will process a whole folder overnight.
Uploading
Home internet connections upload far more slowly than they download. Your plan might advertise a download speed of several hundred megabits per second, but the upload is often ten or twenty times slower. A few hundred gigabytes of converted video can take days of continuous uploading, and that's a function of your connection speed, not a software problem.
Where to upload it
There's no single right answer here, but here are a few popular options
- Google Photos and Apple iCloud: organizes everything by date and let you browse from a phone. The storage pricing climbs quickly once you cross a terabyte, and both services may recompress video on the way in, which means what comes back out isn't bit-for-bit what you sent.
- Google Drive, Dropbox, and OneDrive are plain file storage. You upload a file and you get that exact file back, with no recompression and no reorganizing. You pay for the space and that's it.
- IDrive gives you 5TB across all your devices and provides ongoing backup in addition to the extra storage space. For home video that allowance goes further than it sounds: a two-hour tape converted to H.264 lands around 2GB, so a closet full of fifty tapes still leaves most of the 5TB free.
A synced folder is not a backup
If you drop the videos into a Dropbox or Google Drive folder on your laptop and that folder syncs to the cloud, deleting the folder on the laptop deletes it in the cloud too. Both services keep deleted files in a recovery window — usually 30 days on consumer plans — but after that window the files are gone from both places.
The safe arrangement is one copy at home and one copy in the cloud, with the cloud copy either in a dedicated backup service like IDrive or in a folder you don't touch after uploading.
Name the files so you can find them
Capture software produces names like CAPTURE_0017.AVI and VIDEO_00034.MPG, and nobody will ever open those. Rename them before you upload, using year-month first and then a plain description:
- 1998-07 - Hawaii trip.mp4
- 2002-12 - Christmas morning.mp4
- 2004-05 - Emily soccer game.mp4
Putting the date first makes the folder sort itself in chronological order, and the description means your kids will be able to find things in this folder in twenty years without having to open every file to see what's in it.
The short version
Check that each tape plays. Capture in real time with a USB capture device (e.g. Roxio), setting the input to composite. Convert the captures to MP4 with H.264. Upload to whichever cloud service fits your budget and how you want to use the files. Keep a copy at home too, because a synced folder is not a backup. And once a year, open a few of the files and confirm they still play.

Leave a comment