Many of my friends (and family members) have said to me “So Rick… how do I get started creating my own blog?”… and I’ve had the privilege of helping some of them to take that first step towards what would become both a passion and a higher quality of life for them.
Many of my friends (and family members) have said to me “So Rick… how do I get started creating my own blog?”… and I’ve had the privilege of helping some of them to take that first step towards what would become both a passion and a higher quality of life for them.
In this series, I’ll walk you through the process of creating a blog, from start to finish. It will only take a few minutes, and it’s easy enough that you don’t even have to be a geek like me to be up and running without having to phone a friend or ask your resident computer geek.
The series will focus on 6 key areas:
- Web Hosting
- Domain Name
- WordPress Installation
- Making it Look Amazing
- Adding Content
- Promoting Your Blog
1. WEB HOSTING

Assuming you have enough content to blog about, you’ll need a place to host your blog, otherwise known as a web hosting provider. That’s just a fancy way of saying “a place to store your pages on the Internet, so others can view them”.
Choose the right web hosting provider.
There are lilterally dozens of web hosting providers to choose from, and they all offer very similar features and pricing. The important thing to consider is how they handle outages, server problems, or even just the occasional call to check up on your web site.
That’s why I’ve used Hostmonster for over 15 years to host more web sites than I can keep track of. They’ve always been available on the phone and very fast to fix things, and they’ve always been professional and helpful along the way.
For this tutorial I’ll use Hostmonster as the web provider, but they all work just about the same so you’ll still be able to follow along if you’re using a different one like GoDaddy or 1and1.
2. DOMAIN NAME
A domain name is your website name. Each website has an address where Internet users can access it, which is called a domain name, and each domain name has to be completely unique – just like an international phone number is unique.
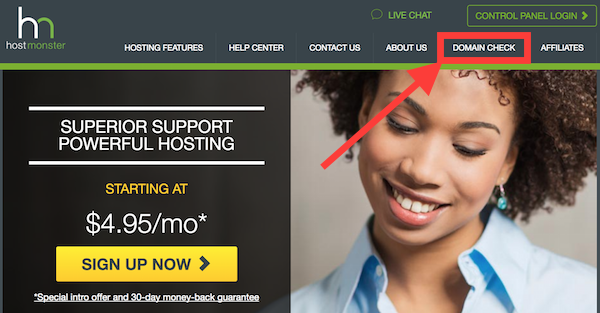
Check if your domain name is available.
You can search for available domain names by visiting Hostmonster and clicking “Domain Check” at the top of the page. You’ll be asked to choose a hosting plan, but you won’t have to actually sign up until you’ve found the domain name you want (and you can change the hosting plan at any time).
Enter the domain name you’ve had in your head all this time, and see if it’s available. Hostmonster will automatically suggest alternatives for your to consider, if the name you want isn’t available.
Reserve your domain name.
Reserve it now – before someone else thinks of the same one and snags it ahead of you!
Once you find the domain name you want, then you can enter your credit card info and purchase the domain for a one, two or three year time period. I recommend just signing up for a one year period for now while you’re just getting started. You can always extend that later when your blog gets popular and goes viral.
With your web hosting provider chosen and your domain name reserved, you’re ready to install your blog.
3. WORDPRESS INSTALLATION
It’s important to choose a blog platform that’s easy to use (especially for people who are not very technical or don’t know any HTML) yet crammed full of useful features. WordPress is hands-down the most popular and user-friendly blogging platform out there.
So let’s install your blog!
When you first log into your Hostmonster account, you’ll see a list of widgets and the one you want is titled “Install WordPress” (it’s almost like they just knew you’d eventually want to start your own blog someday, right?)
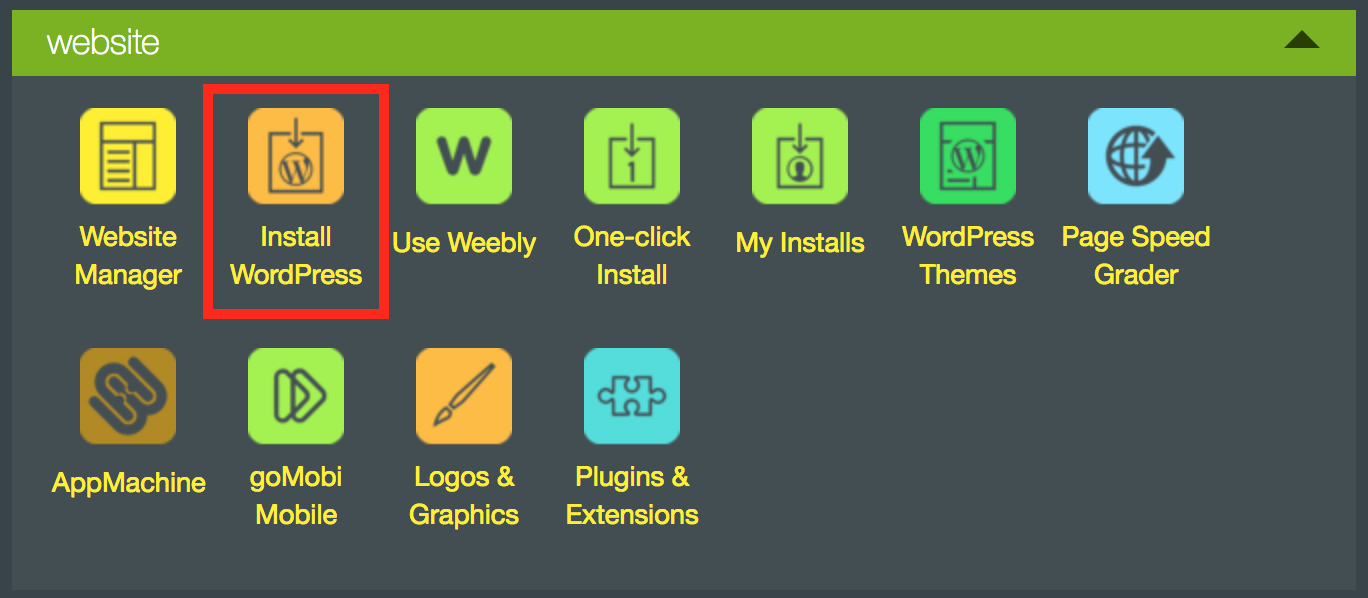
Go ahead and click “Install WordPress” and then click the green “Get Started” button.
Enter the domain name you reserved, and then click “Next”.
The installation wizard will ask you the name of your site (the human-readable name that visitors will see at the top of your blog) and the admin account info. Use something you’ll remember, because this is the account you’ll be logging into your new blog with, once it’s set up.
It only takes a few seconds to create the blog from here, so go ahead and click “Next” to finish up the process.
If you’re watching the clock, we’ve only spent about 10 minutes tops at this point, and you now have a live, working, functional blog that’s 100% ready to use. In fact, go ahead and open a separate tab in your browser and enter the domain name of your blog… for example, http://your-blog-name.com.
Pat yourself on the back because you’re doing great so far!
In the next tutorial, we’ll focus on the look and feel of your new blog by applying a theme. Fortunately there are dozens if not hundreds of free themes for WordPress that are beautiful starting places, and they’re just as easy to install.
As much as I love Hostmonster
As much as I love Hostmonster, and highly recommend them… there occasionally are deals like the current one with GoDaddy that are just TOO good to not at least mention.
If you use my affiliate link you’ll get hosting for only a dollar a month – yes, only$1 – and you’ll also get a free domain name with your purchase.
You can still install WordPress on GoDaddy too, just like you can with Hostmonster.
So if it were me, I’d take advantage of this offer, which is the lowest priced web hosting I have ever seen.