Question: I have music that I bought from iTunes that I can’t play on my blackberry, or even on my computer with Windows Media Player. Is there a way around this limitation? I mean, I paid for this stuff, so I should be able to play it outside of just iTunes!
Answer: I completely agree with you. If you paid for music, then you shouldn’t be limited to playing it in on just your one computer running iTunes (in my opinion anyway).
When you buy songs from the iTunes store, it downloads them to your computer in .m4a or .m4p format. You won’t be able to play those songs anywhere else because they have DRM protection built into the music files.
It turns out that there are two legal ways to remove DRM-protection from music purchased from iTunes, so you can play them on other music players like Windows Media Player, WinAMP, etc.
Let’s start with the hard-but-free way first, and then we’ll cover the easy-and-affordable way.
Approach 1: Make backup CDs using iTunes and then import the CDs back into iTunes.
With this approach, you’ll need a recordable CD or DVD for each album that you want to convert. Plug in the CD-R into your CD burner, select the album in iTunes, and choose the File — Library — Back up to Disc menu in iTunes 8 (used to be File — Backup to Disc in older versions, but now the menu is hidden under the Library menu in version 8 and greater).
Once the backup process has finished, then eject the CD-R, put it back into the CD burner, and then import the songs back into iTunes.
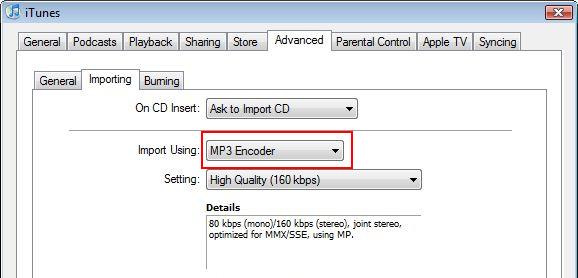
Be sure to configure iTunes to use MP3 encoding when importing songs, which will make sure that it imports them into mp3 format that will run on other music players.
Approach 2 (recommended): Convert DRM-protected songs directly to mp3 format using Aimersoft.