Transferring photos from your iPhone to your computer is a much easier proccess with Windows 10 and here are the steps to take.
Transferring photos from your iPhone to your computer is much easier now with Windows 10, and is also a great way to make sure they’re safe and sound in case your phone gets stolen or lost.
Windows 10 now has a built in Photos app that can import from anything connected, including SD Cards from your camera, USB flash drives, and of course your iPhone. The best part about this app is that it syncs with OneDrive so the photos are stored in the cloud and don’t take up precious space on your computer.
Follow these steps to transfer your photos from your iPhone to your Windows 10 computer:
1. Plug in your iPhone
Connect your iPhone to your computer using the USB charging cable. A message will appear asking if you want to allow the computer to access photos and videos. Tap “Allow” and then leave your phone unlocked.

2. Open up the Photos app on Windows, and click Import
Push the Windows button, and type in “Photos” then click the app to fire it up.

Now choose which account you want to use for OneDrive, and then click the Import button.

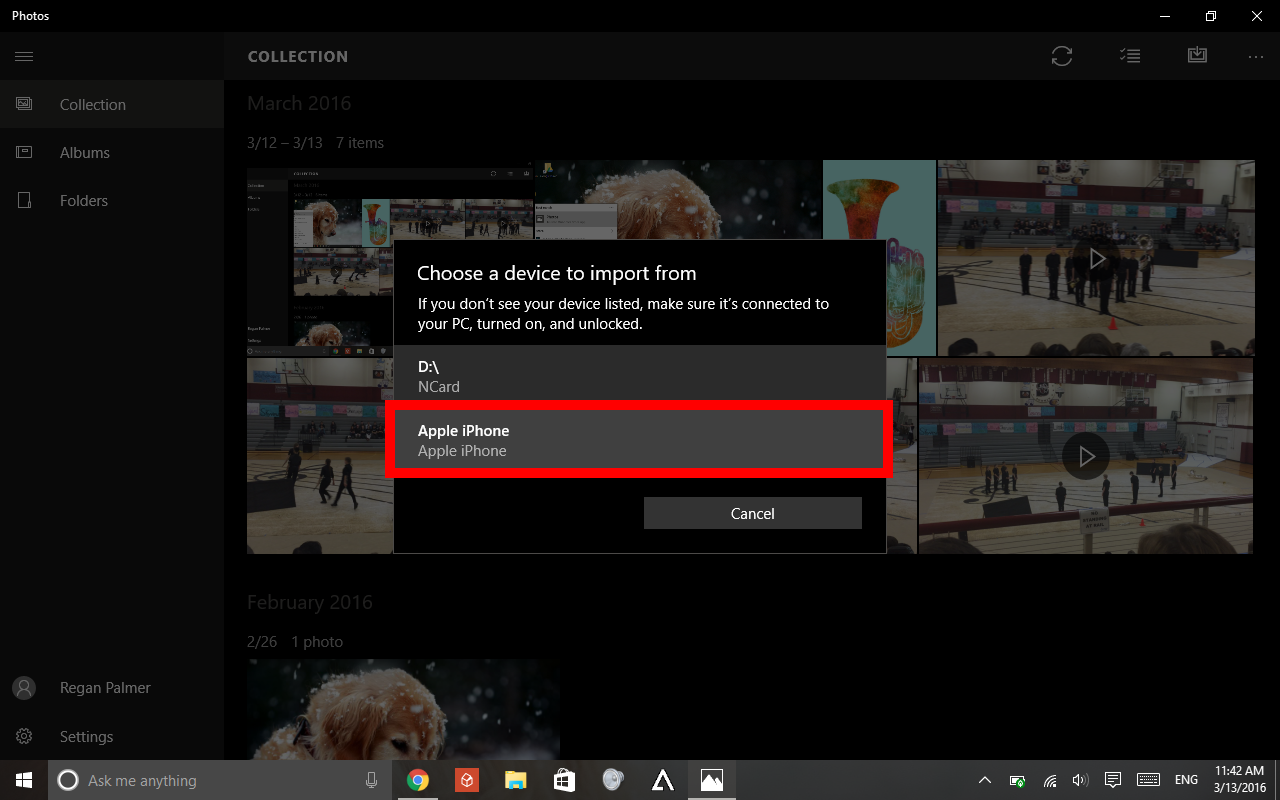
A list will open of available sources to import from, from which you’ll want to choose your iPhone.
You can select and deselect the photos you wish to import, and then click “Continue”

You can also choose to delete the photos when done or keep them on the phone.

That’s all there is to it!
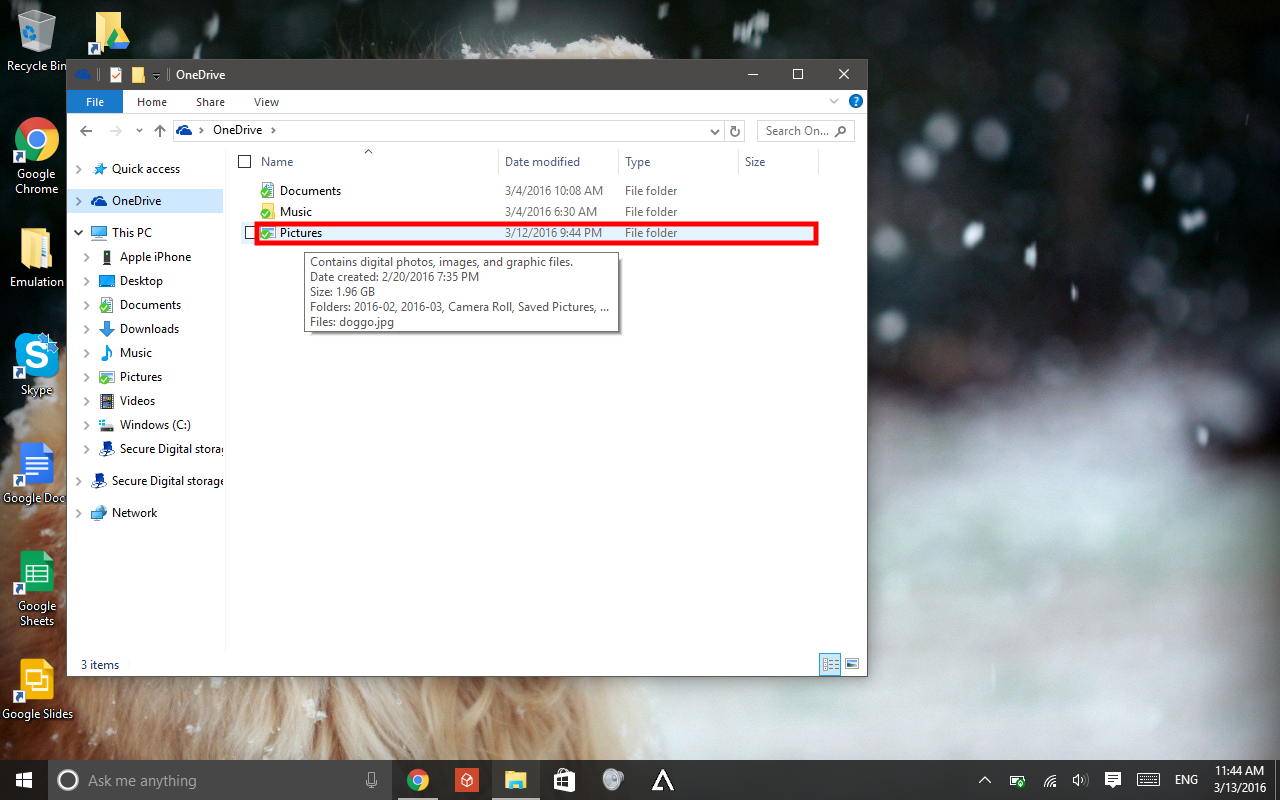
Once the import finishes, your photos can be found through the photos app, onedrive.com, or in your computer’s file system under “Pictures”

This import method also works with removeable USB or SD card storage. Follow the steps the same way and choose the device from the list.

Now if your phone gets stolen or lost you will have your family memories and selfies with friends perfectly safe on your computer and in the cloud.
What about Android Phones,
What about Android Phones, which may be easier?
It’s a little more
It’s a little more complicated to import photos from an Android phone to Windows, and here’s also how to import photos from an Android phone to a Mac.