Setting up a mail merge using Word and Excel is fairly easy and can save you a lot of money at the print shop by doing it yourself.
Kinko’s charges a $45 setup fee per mail merge and they use a proprietary 33-per page label format that doesn’t work with Microsoft Office’s built-in label templates that only print 30 labels per page.
If you follow the steps in this article or video, you’ll learn how to create a custom mail merge template that works with Kinko’s proprietary 33 labels per page format. You also won’t have to pay Kinko’s $45 setup fee since you’ll be handing them a completed mail merge file in Adobe PDF format that’s ready for printing!
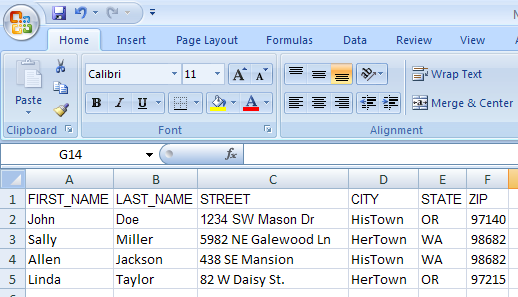
To get started you’ll need to create an Excel spreadsheet containing addresses for each mailing address. You can use any column labels that you like, but make sure they’re in the first row of your table. These labels will be used later when we create the mail merge in Word.
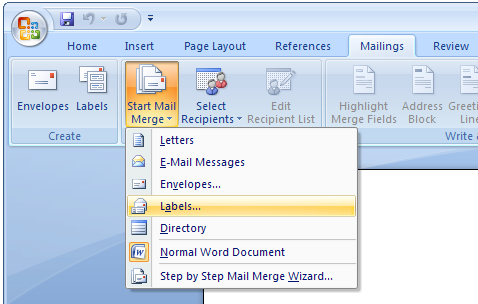
Open Word and select “Mailings” from the toolbar ribbon. Click “Start Mail Merge” and select “Labels” from the popup menu.
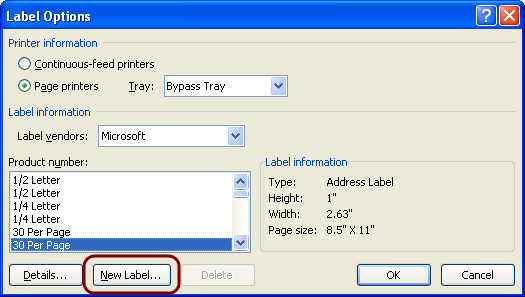
Choose the 30 per page Microsoft label template to use as a starting point and click “New Label” to create a new template.
Kinko’s labels are slightly smaller in size and print on 11 rows per label sheet, so you’ll need to modify the label margins, height, width and pitch, as well as increase the number of rows to 11.
I got these measurements by asking the Kinko’s clerk for a page of labels, and then measuring the dimensions with a ruler. Then I proceeded to print 170 pages of mailing labels for a local fund-raiser, so the dimensions are tried and trued.
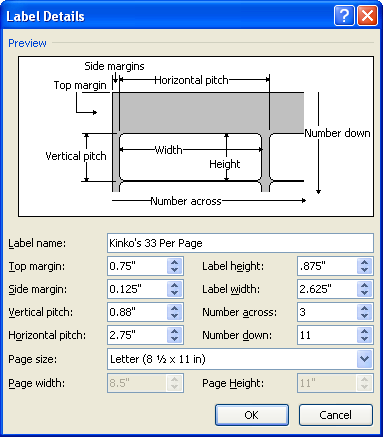
Save your changes and click “OK” to use this new template.
Next we’ll link the Word mail merge document with the Excel spreadsheet that contains the actual addresses. Click “Select Recipients” and then “Use Existing List” from the popup menu.
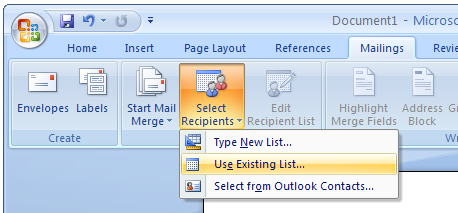
Find the Excel spreadsheet and click OK to use the first spreadsheet tab that contains your mailing address labels.
Click “Insert Merge Field” on the Mailings toolbar ribbon to insert each desired mailing field – First name, last name, street, etc.
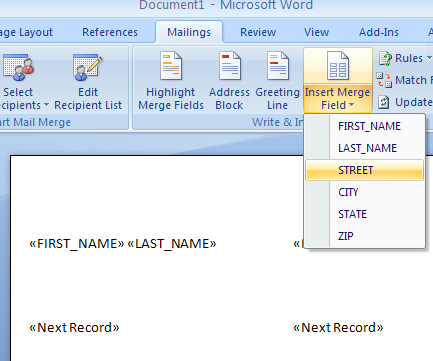
Once you’ve added the mailing fields, highlight the first label and right-click to format the paragraph settings. Increase the left margin to .32 inches and set the Before Spacing to 0 inches.
This will ensure that the label text is printed in the correct place on each label.
Click “Update Labels” on the Mailings toolbar ribbon, which will update all of the other labels on the mail merge template.
You can view the merged data labels by clicking “Preview Results” which will show you the first page of mailing labels.
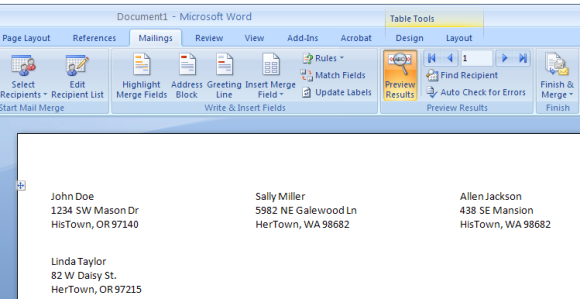
Click “Finish & Merge” and then “Edit Individual Documents” to save the completed mail merge.
The last step will be to save the completed mail merge file in Adobe PDF format, which you can copy to a USB flash drive and hand to the Kinko’s technician for final printing.
Mailing labels cost .50 cents per sheet at Kinkos, but you won’t have to pay the $45 mail merge setup fee because you’ll have done that work yourself.

What font size must be used?
What font size must be used? Can you use any font?
Any font is fine to use but
Any font is fine to use but make sure it doesn’t take up more space than each label itself, so the text of each label isn’t cut off if the font size is too large.
You’ll see when you do the preview step if the font size is too large.
Thanks so much – I didn’t
Thanks so much – I didn’t want a whole pack of labels and when Kinkos said they would sell me individual sheets I thought that was too good to be true. Then once I get home and realize there’s no Avery template to match I soon realized I was up a creek…that is, until I found this 🙂 Printed my own at home, no problem. Used your specs above to set up a custom label in Word and was done in no time – THANKS!
Thanks!
LOL a FedEx Office employee gave me this template, it’s what she uses at work. I’m glad she saved me $45