Connecting the Plantronics Voyager to my iPhone was a complete breeze, but getting it to work with my computer took a little persistence and eventually an operating system upgrade. Here are the steps to take.
Plantronics makes top-rated bluetooth headsets that are super light, sound great, and look really cool. I recently acquired the Plantronics Voyager PRO because it lets me connect with both my iPhone and my computer. That means I can use it on the road for hands-free phone conversations in my car, and I can also use it for Skype calls on my computer (or with my VoIP softphone that lets me dial anywhere in the world over the internet, without paying long distance rates).
You can get a Plantronics bluetooth headset here on Amazon for under $70.
Connecting the Plantronics Voyager to my iPhone was a complete breeze, but getting it to work with my computer took a little persistence and eventually an operating system upgrade to Mac OS X 10.6.8. It turns out there was an incompatibility with OS X version 10.6.6 and the Plantronics headset, that wouldn’t let it be recognized as an audio device no matter what I tried. Upgrading to OS X 10.6.8 solved the problem, but I’m sure that’s been fixed by now and shouldnt be an issue if you’re reading this today.
Here are the steps I took to connect my Plantronics Voyager PRO to my Macbook Pro and use it as the audio device for Skype, iTunes, or any other sound application:

1. Upgrade to Mac OS X 10.6.8 or later
To upgrade your operating system, simply click the Apple icon at the top left of your screen and select Software Update. Your Mac will check your version against the current version available, and will ask you if you’d like to download and install it. Just follow the prompts and say “yes” to everything, and you’ll be upgraded in a few minutes after a full system restart.
You can skip this step if you have the latest version of Mac OS X installed.
2. Pair your Plantronics bluetooth headset with your computer
Make sure bluetooth is enabled on your computer by clicking the Bluetooth icon at the top of your screen, and selecting “
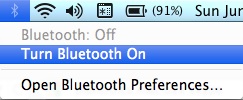
Turn off your headset by pressing the power button. Then, press and hold the power button on your Plantronics headset until it flashes blue and then red. This makes it “discoverable” by other bluetooth enabled devices like your computer. Click the bluetooth icon at the top of your computer screen and select “Set Up Bluetooth Device” from the drop down menu.

Your computer will find (discover) your headset and then simply click “Continue” to complete the pairing process.
3. Configure your Plantronics headset as an audio device
Press the Call Control Button on the side of your headset (the same button you press to take an incoming phone call). Wait about 3 – 4 seconds and you’ll hear a beep and will be asked if you’d like to use the Bluetooth PROPlantronics as your audio device.
Click the “Use This Device” button and your headset will work just like a pair of headphones, and will also work as a microphone.

Open iTunes, Skype, or any other application that uses audio input or output and your Plantronics will play sound and listen to your voice. You can check on your configuration by opening System Preferences (clicking on the Apple icon on the top left of your screen and selecting “System Preferences” from the drop down menu).

Click “Sound” and you’ll see your Plantronics headset listed as an Output and Input device. There aren’t any Output device configuration settings, but you can control volume on the headset itself using the + and – buttons on the top of the headset.
That’s all it takes to set up your headset to work with your Mac.
If you’re looking for more information about Plantronics headsets and other types of headsets, then I highly recommend the article published by the team at Reviews.com. They researched several top bluetooth headsets including the Plantronics Voyager, and you can see how it stacks up against other brands like Sennheiser and Jabber.

This made my day
I don’t know how old this info is, but I just used it to connect my PRO+ to MBA and it worked like a charm.
You = awesome. Me = grateful.
Thanks! Your guide helped me
Thanks! Your guide helped me fix me successfully pair the Plantronics Backbeat FIT Wireless Music headphones via Bluetooth with her MacBook Pro. I simply enabled Bluetooth on the MacBook Pro, then turned off her headphones by pressing its Power button (until you hear it say “Power Off”), and then Opened the “System Preferences > Bluetooth” window on the MacBook Pro and watch the table of “Devices” in anticipation. Lastly, Press and HOLD DOWN the same Power button until the Device Named PLT-BBFIT appears in the “Device” table (whilst you are holding down the Power button, you will first hear it say “Power On”, and then moments later you will hear it say “Pairing”, and suddenly PLT-BBFIT appears).
Thank you very much for the
Thank you very much for the helpful advice! I think the thing that helped it work was the holding it down and leaving it on. This advice worked for my Beat GO 2 headphones.